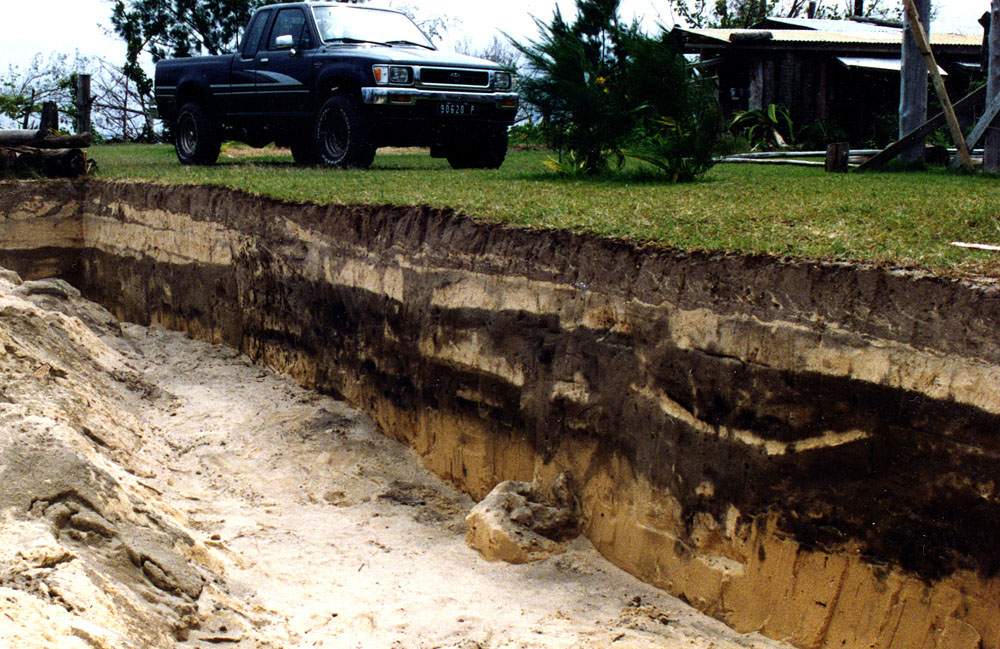
| The Shutler profile was undertaken in March of 1995 in an attempt to reveal the complex layer system at the ATIAHARA trench site. Here we see approximately 11 meters of the exposed layers (sse camera 'h' in the photo map). I have chosen a representative slice out of the wall in the enlargement below. |
| Robert Bollt elected to use a simplified enumeration of these layers for the 2007 excavations. The diagram above illustrates his system without including the options that were occasionally employed such as C1 and C2, C1 representing an 'event' in the C layer. |

| The above profile has been rendered from Eddowes original profile of the west wall of Section A - Squares M12 - M10 (see camera 'a'). His system is more complex and yet does not appear to allow for a distinction between Bollt layers E and F. Mark's plan lumps E and F into one layer that is divided in three sub layers 5-a-i, 5-a-ii, 5-b. In both plans the authors have ignored the clean sand layer that occasionally separates the two lowest Bollt layers (E and F). This layer can be seen in the photo of my Section B ,7-8 wall, which is shown by camera 'b' on the map below. Also see camera 'c' which is a 2007 photo which gives a far better idea of the real colour of these layers and is a very interesting reverse side of the camera 'b', here we see to the left, the backfill of Shutlers square 8-9 while on the right the backfill of my 7-8 square (Section B). Camera 'd' shows a 2007 view of the excavated square L11 exposing the wall of M11 which should in some ways match the Eddowes profile, we can see infact the ash layers as well as the backfill of his square K10 to the left. Robert Bollt had to climb the aito trees to get the photo shown by camera 'e', this picture was taken on the 8th of November, quite early in the excavation, we see that all the upper layers have been removed leaving only layer F. |
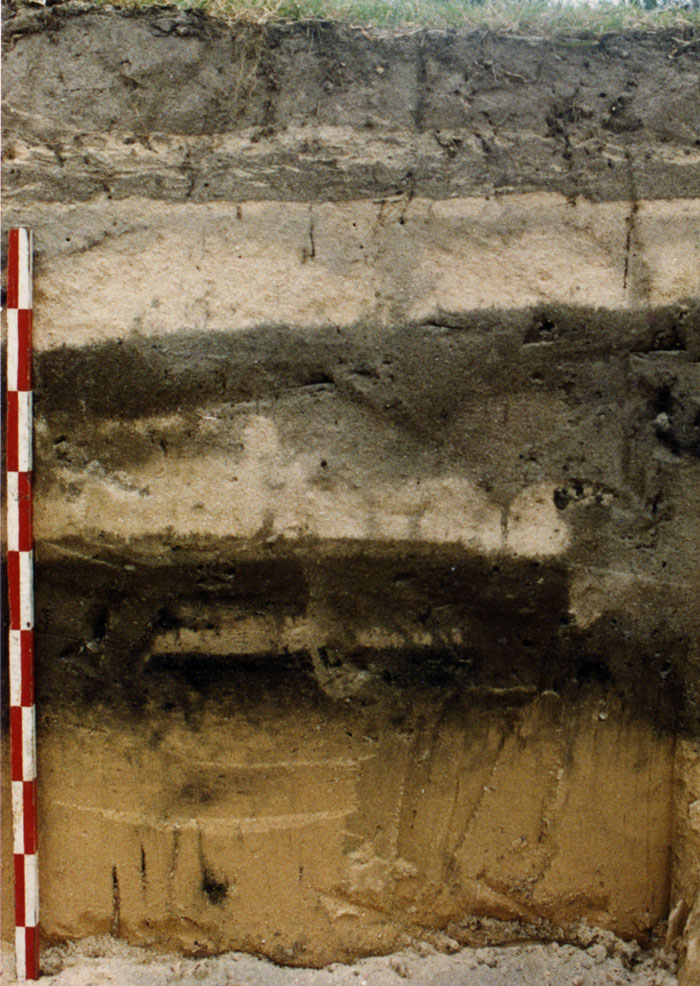
| The photo shown above is from my 1995 excavation, Section D, here we can see that there may be additional layers to take into consideration, even if we do not count the layer that separates Bollt layer E and F. The 2007 excavation of the squares that adjoined my D section excavations revealed a deep fire pit that appeared to be below layer F. Further to this, Layer F may actually be two layers F and G (as shown above) even if we consider this oven to be part of G, future layer systems should include the shallow sterile sand layer below G as well as the coral hardpan layer as the lowest limit of all excavation. |
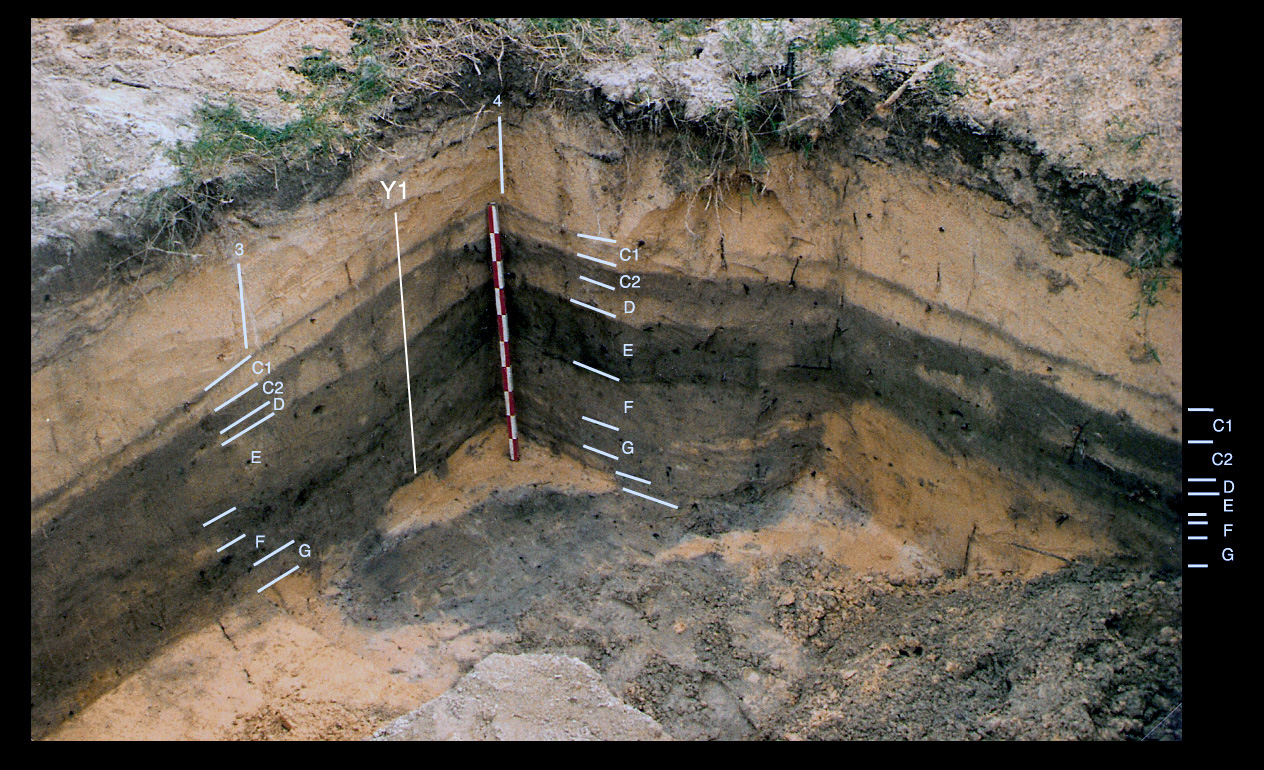
| Here we see the last square to be excavated in 2007 (Y1), it borders on my old 1995 Section D excavation, which is to the right. It is probably situated mid square 3-4 (as shown by the white line in the diagram 'Layer Designations 2008'). |
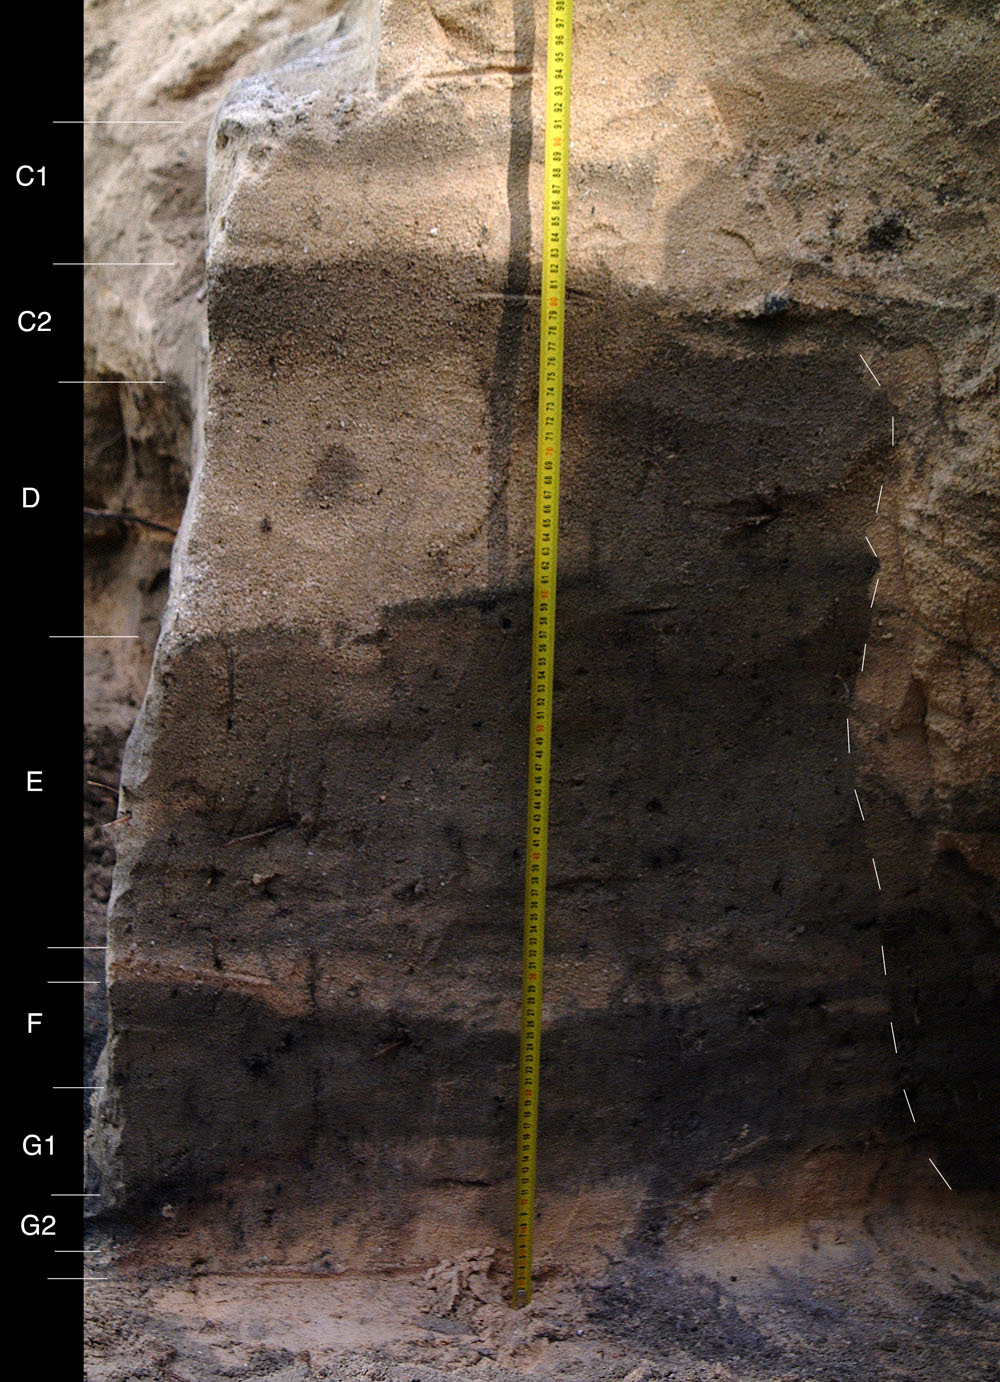
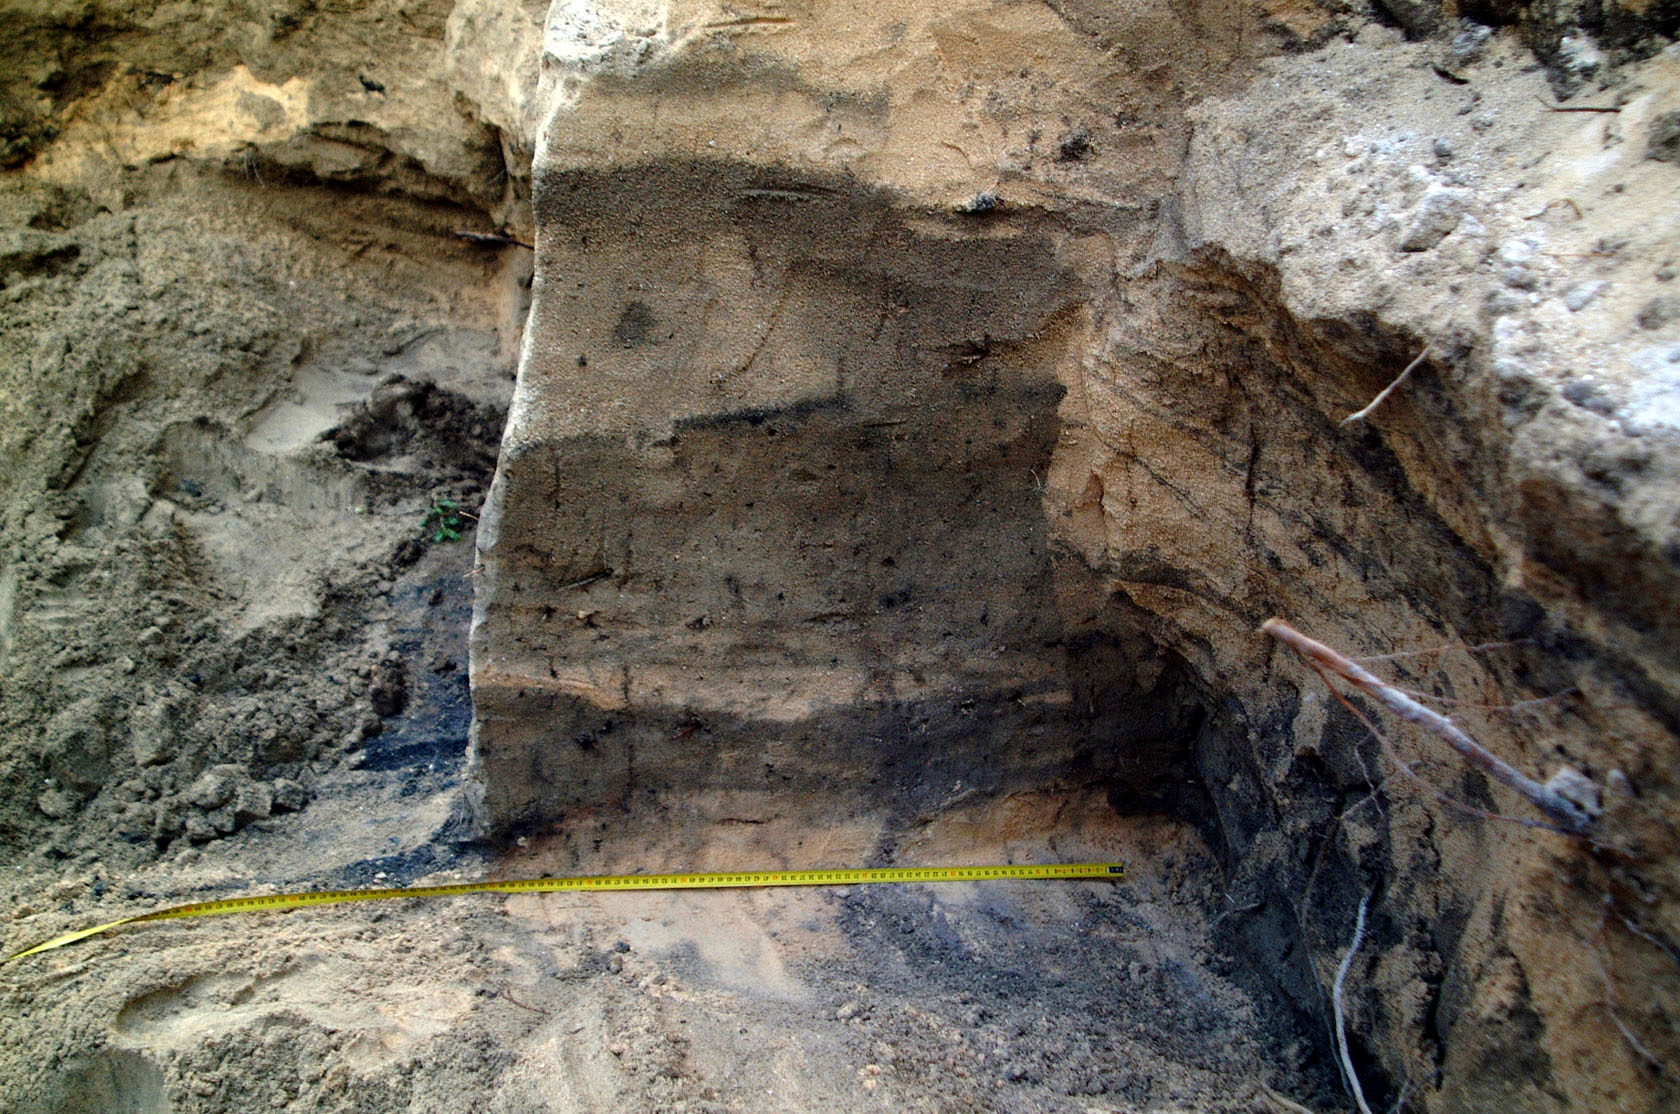
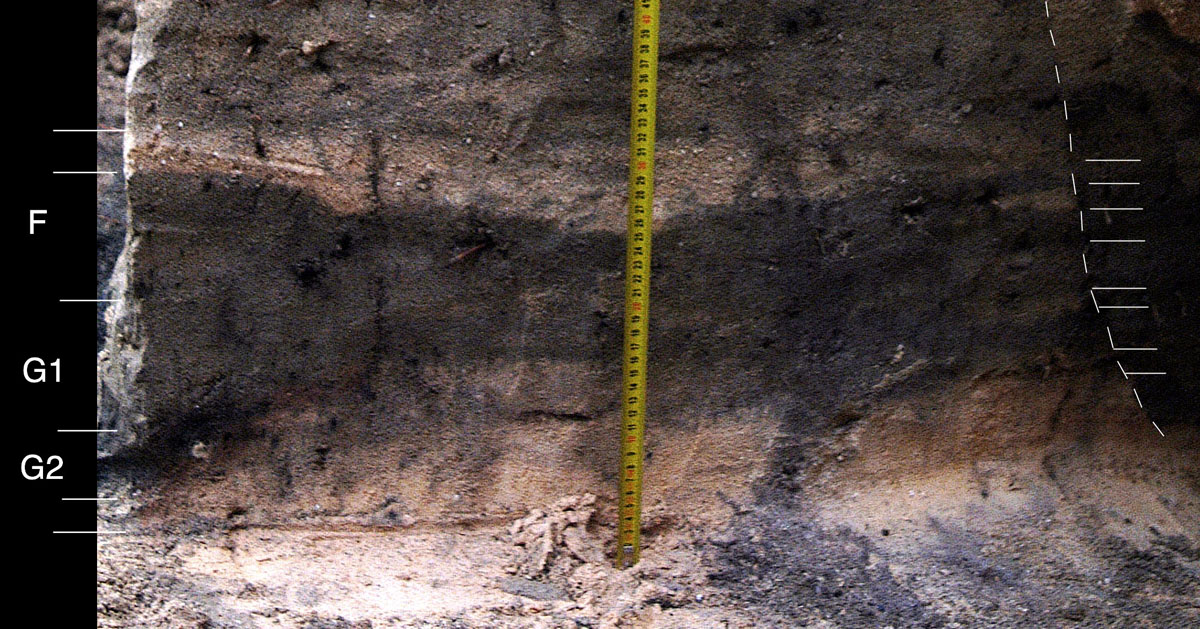
| I have added the new layer designations to this profile even though this must be considered only a preliminary attempt to better define the layers. In the photo below, which is an enlargement of the F/G layer, you will notice that there is a very real distinction between the E and F layer while there are discrete layers visible within the F and G layers (far right side). |
| go to the next page ATIAHARA - large layer G2 Fire Pit found in square Y2 |
| Go to Comparative Implementology | go to ATIAHARA.ORG |